
Step-by-Step DIY Coolant Flush & Replacement Guide For Beginners
You don’t need professional garage experience or expensive specialty tools to fully flush and replace your vehicle’s coolant. This complete beginner-friendly walkthrough breaks down every stage, including easy air bleeding techniques, a minimal tool checklist, and critical safety rules to prevent hot fluid burns or cooling system air lock. Save hundreds on mechanic labor by completing this routine maintenance yourself in under an hour.
Pre-Work: Must-Have Basic Tools & Supplies
Gather these affordable household items before starting:
- Drain pan (to catch old waste coolant)
- Pair of heat-resistant work gloves + safety goggles
- Funnel for clean new coolant refilling
- Manufacturer-specified fresh coolant (match OAT/HOAT/IAT/EV formula)
- Distilled water (only for pre-flush rinsing)
- Rag towels for spills and cleaning
- Jack & jack stands (for undercarriage radiator drain access)
Critical Pre-Service Safety Rule
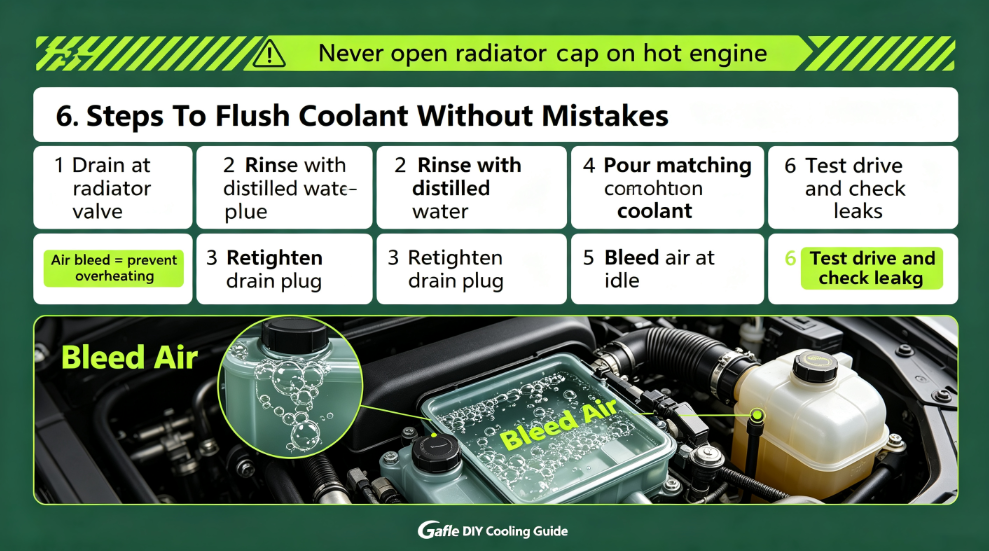
Never open the radiator cap or drain coolant when the engine is hot. Hot coolant reaches 100°C+ and sprays violently, causing severe scald burns. Let the engine cool fully for 2–3 hours before starting any flush work.
Step 1: Locate The Radiator Drain Plug
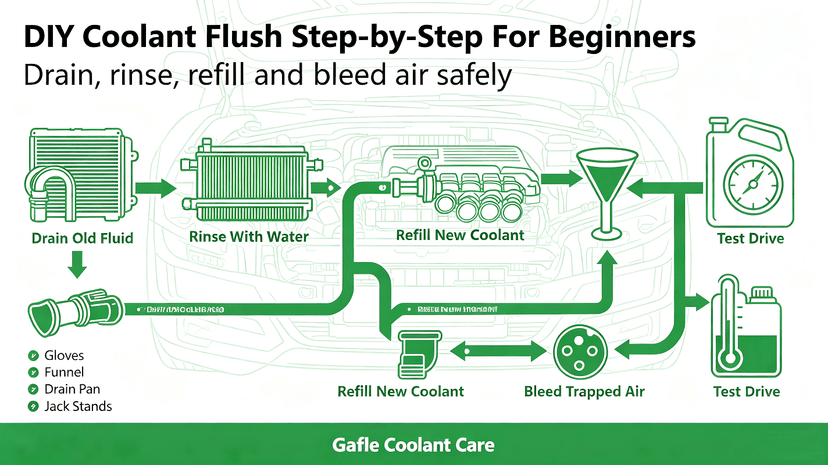
Raise the front vehicle with jack stands, slide under the chassis, and find the small plastic drain valve on the bottom edge of the radiator. Place your drain pan directly underneath to catch all waste fluid.
Step 2: Drain Old Degraded Coolant
Twist the drain plug counterclockwise to release all aged contaminated coolant. Let the fluid flow completely until the stream slows to a drip, then retighten the drain plug firmly (do not over-torque to avoid cracking plastic threads).
Step 3: Flush The System With Distilled Water
Pour distilled water into the coolant overflow reservoir, start the engine and turn the heater to maximum hot setting. Let the engine idle for 10 minutes to circulate clean water through the full cooling loop, then drain the water out again to wash away sludge and residual old coolant. Repeat this rinse cycle twice for heavily contaminated systems.
Step 4: Refill With Fresh Matching Coolant
Close the drain plug fully, insert your funnel into the reservoir neck, and pour new coolant slowly up to the MAX fill line marked on the transparent tank. Double-check you are using the exact formula specified in your vehicle owner’s manual.
Step 5: Bleed Trapped Air (Most Important Step)
- Leave the reservoir cap loose, start the engine, and run heater on full hot idle for 15 minutes.
- Watch the coolant level drop as air bubbles rise to the surface; top off fresh coolant gradually to maintain the MIN-MAX range.
- Once no more air bubbles surface, tighten the reservoir cap securely to seal the closed cooling loop.
Step 6: Post-Flush Test Drive
Take a 10–15 minute slow test drive, monitoring the engine temperature gauge closely. If the gauge climbs unusually high, trapped air remains in the system and requires a second bleeding cycle. Check underneath the car for slow fluid leaks after parking.
Final Takeaway
This simple DIY coolant flush process is accessible for every new car owner with basic hand tools. Following the step workflow and mastering air bleeding eliminates costly air lock overheating issues, while strict cool-engine safety practices prevent painful hot coolant burns. Regular self-flushing cuts long-term vehicle maintenance costs dramatically.